Features
Soil
Getting the most from soil sampling
Good soil sampling practices produce more reliable results.
September 12, 2019 By Ross H. McKenzie, PhD, P. Ag.
 The most common error made by soil samplers is not taking enough samples. Shortcuts at this stage result in increased variation, causing increased error.
 Many farmers do not soil test due to past frustrations of perceived variability with soil analytical results and huge inconsistencies in fertilizer recommendations by soil testing labs. But not assessing soil nutrients and soil quality of fields is a missed opportunity. The concern of analytical variability can be reduced by ensuring fields are soil sampled properly, samples are handled correctly and analyzed by soil testing laboratory that is accredited by the North American Proficiency Testing Program (NAPT). Farmers should work with a qualified professional agrologist (P. Ag.) or Certified Crop Adviser (CCA) with a 4R Nutrient Management Specialty to develop fertilizer recommendations specifically for their local soil, crop and agroecological conditions for their farm.
Sources of soil testing variability
In soil testing, three major sources of variation are: spatial or field variability, seasonal changes and laboratory analytical variation. Generally, laboratory variation should be relatively low if a lab has very good quality control to kept analytical error to a minimum.
Seasonal soil variation is expected. For example, significant shifts in nitrate nitrogen or soil pH are expected over a growing season. Plant available soil P levels may change from fall to spring. Therefore, selecting the proper to time soil sample is important.
By far the greatest variation in soil testing is due to spatial or field soil variation. The spatial pattern of soil heterogeneity, both across a field and with depth, can affect the accuracy of soil analysis.
By far the greatest variation in soil testing is due to spatial or field soil variation.
When topography is rolling, soil variability is often a result of slope position, which affects how soils form and develop. Lower soil moisture conditions on upper slope positions meant less native vegetation growth and less soil development on upper slopes versus lower slope positions over hundreds of years. Soils on upper slopes have been affected by greater soil erosion and soil deposition is greater in lower slope positions. Sometimes soils are variable across landscape due to differences in geologic deposition. Soils may be sandy loam in texture due to deposition by moving water (fluvial deposition) at one end of a field but glacial till deposited fine textured material may occur in other areas. Sometimes the parent material may be higher in sodium and Solonetzic soils have developed due to the high presences of sodium. There are many factors that can cause a profound range of different types of soil variation in cultivated fields.
Dealing with soil spatial variation
Farmers who are concerned with soil variability should consider working with an unbiased P. Ag. or CCA to decide which fields are uniform enough to be soil sampled as one unit versus fields that have two or more different soil areas. This would include deciding if soil areas are difference enough and large enough to be managed separately.
A number of companies provide services to prairie farmers to develop field variability maps with different soil/crop management zones. Various techniques are used to develop management zones, including crop yield maps, topographic maps, soil salinity maps and soil electrical conductively (EC) maps. Remote sensing imagery, such as NDVI (normalized difference vegetation index) can be created from information collected from satellites or drones to identify relative lushness of crop growth, greenness of crop or estimate crop biomass.
Ideally, a layered mapping approach is needed to accurately develop a field variability map with unique soil/crop management zones. An experienced agronomist will use a good topography and elevation map, and electrical conductivity map as a starting point. Crop yield and imagery maps can be included in the layering to assist in identifying crop production differences, depending on how consistent the information is from year to year. As technology improves, soil carbon, soil pH and soil texture mapping can be added to the layered maps, to help to develop accurate soil/crop management zones in a field.
For each field or management zone, soil samples can be taken using random sampling or benchmark sampling. Random sampling collects soil samples from locations that are randomly distributed across a field or within each management zone of the field. Using a zigzag sampling pattern often works well. Avoid sampling non-representative areas of the field or zone.
For benchmark sampling, a single representative site is selected for each field or management zone of a field. The benchmark site is usually about .25 to one acre in size. The same location can be sampled each year to accurately reflect soil nutrient changes.
A number of studies have been conducted to determine the number of samples required to obtain are reasonable estimate of mean for various analyses. Ideally, the value for nitrate-nitrogen should be within 10 pounds of nitrogen per acre, and phosphorus should be five pounds of phosphorus per acre of the true mean of the field. Typically, between 20 and 30 samples must be taken per field or soil management zone to achieve a reasonable estimate of the mean.
The most common error made by soil samplers is not taking enough samples.
The most common error made by soil samplers is not taking enough samples. Shortcuts at this stage result in increased variation, causing increased error.
Soil sampling depths
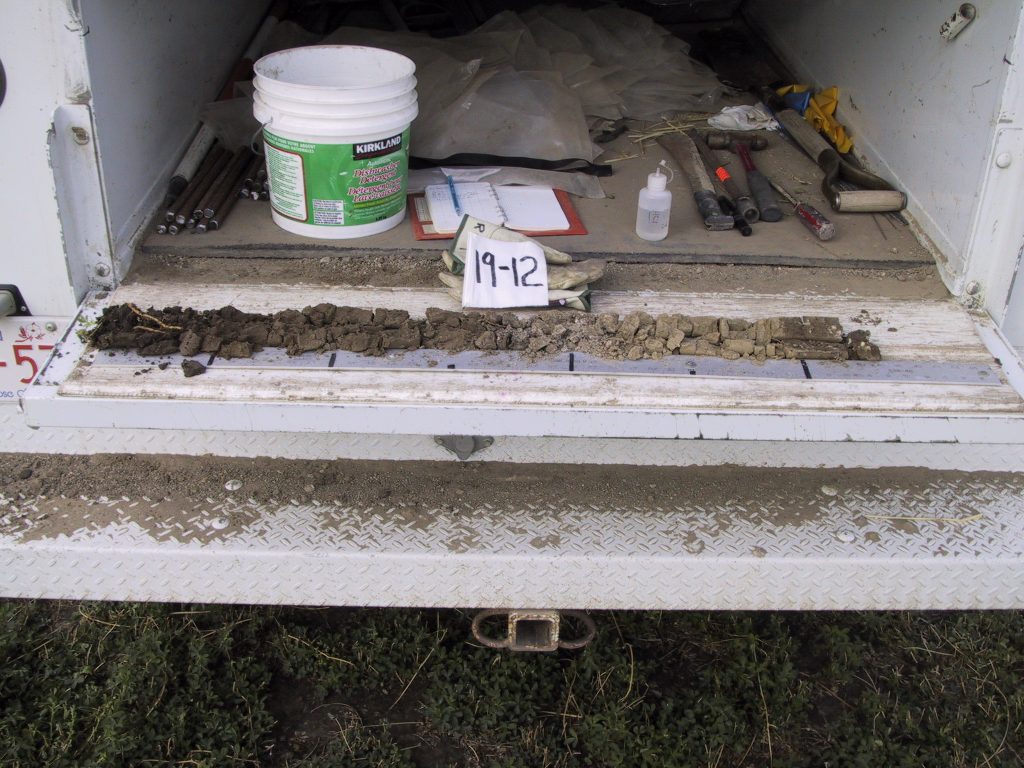
Soil samples should be taken to a 24-inch (60 centimetre) depth. Ideally, soil samples should be taken at zero- to six-, six- to 12- and 12- to 24-inch (or zero- to 15-, 15- to 30- and 30- to 60-cm) depths. Deeper sampling to 36- or 48-inches (90 or 120 cm) may be necessary for manured fields or for deeper-rooted crops.
Keeping the zero- to six-inch sampling depth separate is important, as all soil test and fertilizer calibration research conducted across Western Canada with phosphorus (P) and potassium (K) has been done with the zero- to six-inch depth. To accurately assess nitrate-nitrogen (NO3-N) and sulphate-sulphur (SO4-S) levels, it is important to sample to 24 inches, as both nutrients are mobile in soil. Sampling to 24 inches helps to more accurately develop N and S fertilizer recommendations.
Timing of soil sampling
Ideally, fields that will be seeded in spring should be soil sampled just prior to seeding in spring to most accurately assess nutrient levels. But this leaves little time to develop specific fertilizer management plans for each field and order fertilizer.
From a practical standpoint, spring-seeded fields can usually be soil sampled after early to mid-October, when surface soil temperature has declined to lower than 5 C to 7 C. When soils are moist, waiting until soil temperature has declined is important to ensure soil microbial activity is low. Then, any changes in plant available nutrients between late fall and spring should usually be minimal. Soil sampling frozen ground can be challenging due to the difficulty to obtain accurate and representative sampling depths.
From a practical standpoint, spring-seeded fields can usually be soil sampled after early to mid-October, when surface soil temperature has declined to lower than 5 C to 7 C.
Soils are usually drier in fall, resulting in less problems with soil compacting in the core tube. When soil compacts in the core tube, this compromises accurately knowing the soil sample depth and greatly increases error in estimating nutrient levels. In southern prairies, winter conditions are sometimes very mild and significant changes in soil nutrient levels may occur between fall soil sampling and spring. In situations when fields are soil sampled in fall, then followed by a mild winter, selected fields should be re-soil sampled in spring to estimate the potential nutrient level changes over the winter.
Soil sample handling
After 20 to 30 sites have been sampled, the sampler must mix the composite soil sample for each depth thoroughly and a half-kilogram subsample should be collected, bagged, labeled and placed in a cooler. As soon as possible, all collected soil samples must be laid out in a thin layer on clean plastic or in aluminum containers, in a clean room to allow the soil samples to completely air dry at room temperature. Samples must be dried to terminate microbial activity and prevent changes, then repackaged and sent to the lab. If moist soil samples are left in bags in warm conditions, considerable chemical change may occur over several days, resulting in inaccurate nutrient or chemical determinations.
Most soil testing laboratories accept moist samples, but these samples must be delivered to the laboratory in coolers within a day of collection. Then, the lab can handle the samples properly.
Sampling your fields
I always encourage farmers to ride along with the person sampling their fields. This provides the opportunity to see the soil cores taken from their fields. Farmers can observe that depths are sampled properly, see if soil compaction in the core tube is a concern and most important, that 20 to 30 samples are taken in each field or management zone. Make sure to view the variance of topsoil depth, depth to subsoil, changes in soil colour and differences in soil texture across the landscape of the field. This is an excellent chance observe differences, ask questions, and learn as much as you can about the soils on your farm.